


A good pumpkin pie recipe should feel calm to make. However, many home bakers feel nervous about it. The crust can shrink. In addition, the filling can crack. Meanwhile, the centre can stay too soft for too long.
This pumpkin pie recipe solves those problems in a simple way. First, it uses a gentle bake. Second, it uses a clear jiggle test. Finally, it uses slow cooling. As a result, the filling sets silky and smooth.
The flavour is warm but not heavy. For example, cinnamon leads the spice blend. Ginger adds a little heat. In addition, nutmeg and cloves add depth. The pumpkin flavour still comes first.
You can make this pie for Thanksgiving or for any autumn meal. US Thanksgiving falls on Thursday, November 26, 2026. Therefore, you can bake ahead with confidence.
Why This Pumpkin Pie Recipe Works
This recipe works because it respects how custard behaves. Pumpkin pie filling is a custard. In other words, eggs set it gently with heat. If the heat is too high, the eggs tighten too fast. Consequently, the surface cracks and the texture turns grainy.
A moderate oven helps a lot. Similarly, a short blind bake helps the crust set before the wet filling goes in. As a result, the base stays crisper.
Balance matters too. Too much liquid makes a soggy pie. However, too little liquid makes a dense pie. This version uses evaporated milk for richness and body.
Finally, patience matters after baking. The pie finishes setting as it cools. If you cool it slowly, however, the slice holds cleanly.
Ingredients You Need for This Pumpkin Pie Recipe
This recipe makes one 23 cm (9 inch) pie. It serves 8 people.
Use room temperature eggs if you can. They mix more evenly. Meanwhile, keep the butter for the crust very cold. Cold butter is the key to flakes.
For the Crust
- 190 g (1 1/2 cups) plain flour, plus extra for dusting
- 1 tablespoon granulated sugar, about 12 g (0.4 oz)
- 1/2 teaspoon fine salt, about 3 g (0.1 oz)
- 115 g (1/2 cup or 4 oz) cold unsalted butter, cut into small cubes
- 60 to 75 ml (4 to 5 tablespoons) ice water
- 1 teaspoon apple cider vinegar or lemon juice, optional
The vinegar is optional. However, it can help keep the dough tender.
If you prefer, you can use a plain shop-bought crust. In that case, skip to the blind baking step. Still, homemade crust gives the best flavour.
For the Filling
- 425 g (15 oz or about 1 3/4 cups) canned pumpkin puree, not pumpkin pie filling
- 150 g (3/4 cup) light brown sugar, packed
- 50 g (1/4 cup) granulated sugar
- 1/2 teaspoon fine salt, about 3 g (0.1 oz)
- 2 large eggs, plus 1 extra egg yolk
- 355 ml (12 fl oz or 1 1/2 cups) evaporated milk
- 1 teaspoon vanilla extract, 5 ml
The extra yolk adds richness. In addition, it helps the filling set smoothly.
The Spice Blend
- 2 teaspoons ground cinnamon, about 5 g (0.18 oz)
- 1 teaspoon ground ginger, about 2 g (0.07 oz)
- 1/2 teaspoon freshly grated or ground nutmeg
- 1/4 teaspoon ground cloves
- 1/4 teaspoon ground allspice, optional
- A small pinch of black pepper, optional
This blend is warm and balanced. For example, the pepper sounds odd at first. However, a tiny pinch lifts the other spices.
You can adjust the spices to your taste. Similarly, you can use 3 1/2 teaspoons of a plain pumpkin spice mix. Still, mixing your own gives you more control.
Canned Pumpkin Puree vs Fresh Pumpkin, Explained Honestly
Both options can make a lovely pie. However, they behave a little differently. Understanding that difference helps you choose well.
Canned Pumpkin Puree
Canned puree is consistent. Its water content is steady from tin to tin. As a result, the filling sets in a predictable way. Its flavour is also deep and even.
For most bakers, canned puree is the reliable choice. In addition, it saves time. You simply open the tin and stir.
Read the label with care. You need plain pumpkin puree. You must not use pumpkin pie filling by mistake. Pie filling already has sugar and spices added. Consequently, your pie would turn out too sweet and poorly balanced. The tins often look similar, so check twice.
Fresh Pumpkin
Fresh pumpkin can taste bright and delicate. However, it takes more work. First, you need a small sugar pumpkin or pie pumpkin. A large carving pumpkin is too watery and stringy for pie.
Cut the pumpkin in half and remove the seeds. Then roast it at 190 degrees Celsius (375 degrees Fahrenheit) for 35 to 45 minutes, until tender. After that, scoop out the flesh and blend it until smooth.
Fresh puree holds more water than canned puree. Therefore, drain it in a fine sieve for at least 30 minutes. Aim for 425 g (15 oz) of thick puree after draining.
Do not waste the seeds. For instance, you can turn them into a crisp snack with this roasted pumpkin seeds recipe.
In short, choose canned puree for ease and consistency. Choose fresh pumpkin when you enjoy the process and have time.
Equipment You Need for This Pumpkin Pie Recipe
You need a 23 cm (9 inch) pie dish, a rolling pin, baking paper and baking beans, a large bowl and whisk, and a wire rack. In addition, an oven thermometer helps, because many ovens run hot or cool.
Pumpkin Pie Recipe: Step by Step Method
Read all the steps before you start. Then prepare the crust first. Meanwhile, the filling takes only a few minutes to mix.
Step 1: Make the Crust Dough
Mix the flour, sugar, and salt in a large bowl. Then add the cold butter cubes. Rub the butter into the flour with your fingertips. Alternatively, use a pastry cutter.
Stop when the mix looks like coarse crumbs. Some pea-sized pieces of butter should remain. Those pieces create flakes later.
Next, add the vinegar if you use it. Then add ice water, one tablespoon at a time. Stir gently after each addition. Stop as soon as the dough holds together when pressed.
Form the dough into a flat disc. Then wrap it well. Chill it for at least 1 hour, or up to 2 days. As a result, the crust shrinks less in the oven.
Step 2: Roll and Shape the Crust
Lightly flour your surface. Then roll the dough from the centre outward. Aim for a circle about 30 cm (12 inches) wide and about 3 mm (1/8 inch) thick.
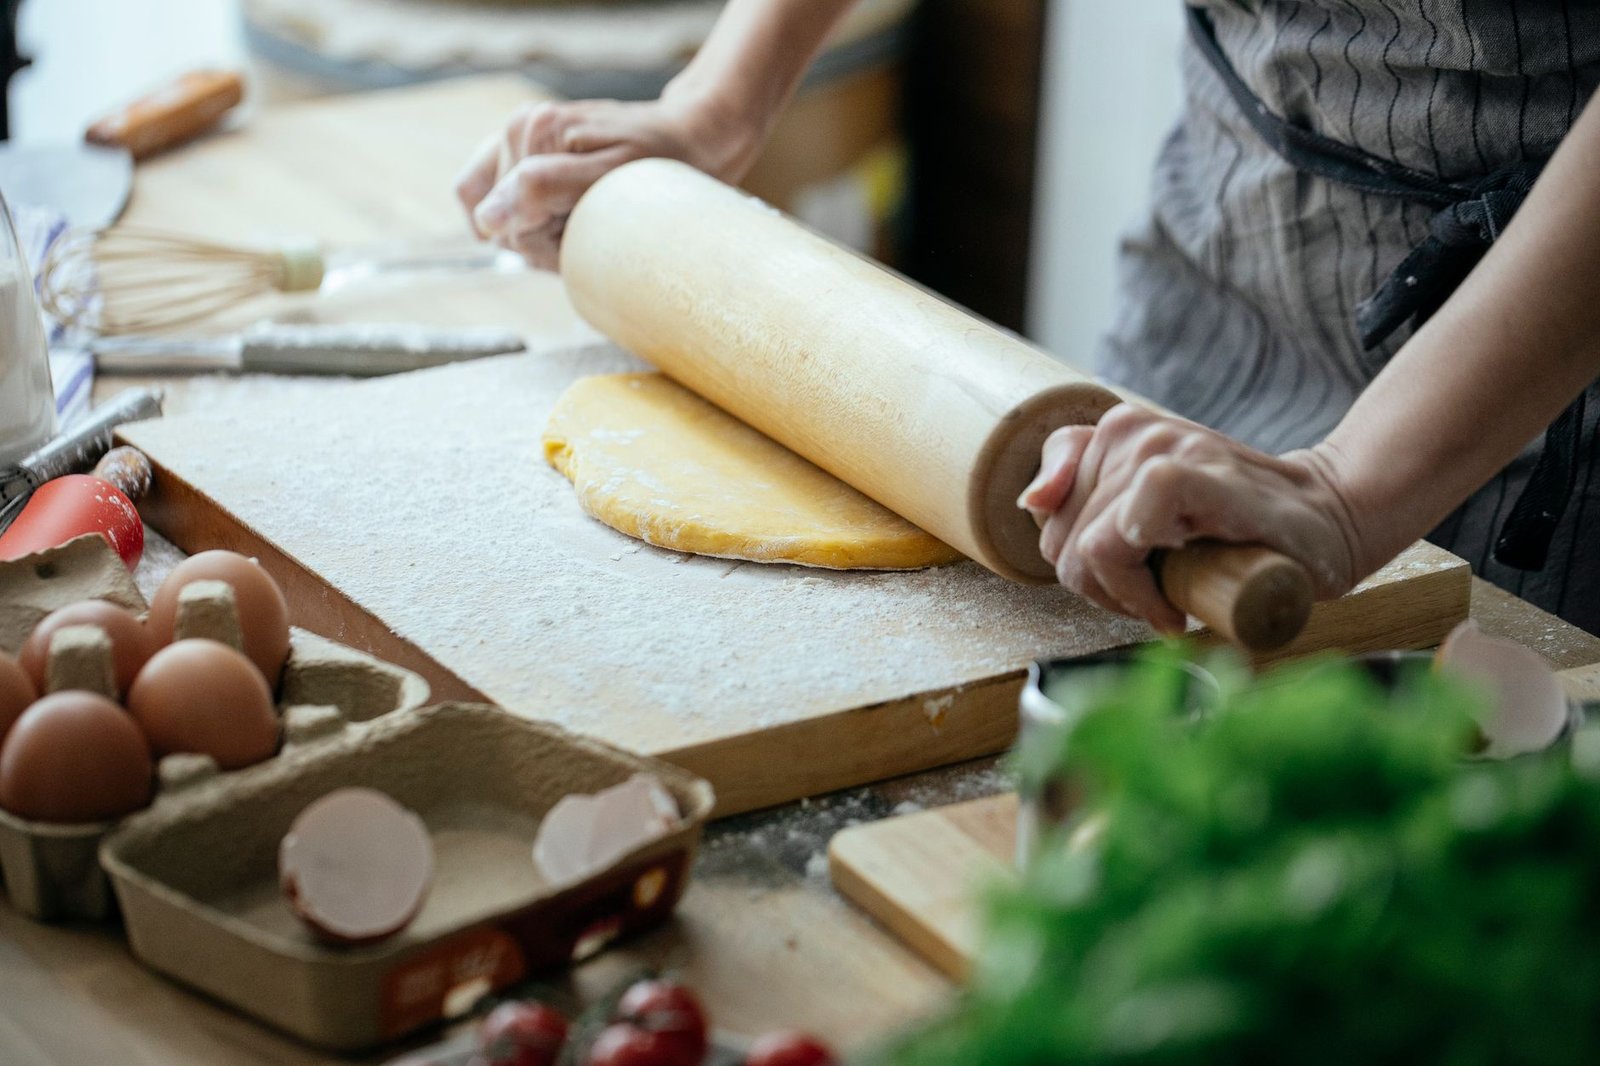
Lift the dough gently into the pie dish. Press it into the base and sides without stretching it. Stretching causes shrinkage, so take your time.
Trim the excess, leaving about 2.5 cm (1 inch) of overhang. Then fold the edge under itself. Finally, crimp the edge with your fingers or a fork.
Chill the shaped crust for 30 minutes. In addition, this firms the butter again before baking.
Step 3: Blind Bake the Crust
Heat the oven to 190 degrees Celsius (375 degrees Fahrenheit). Line the chilled crust with baking paper. Then fill it with baking beans or rice.
Bake for 15 minutes. After that, remove the paper and beans with care. Then bake for 5 to 7 minutes more. The base should look dry and pale gold.
Reduce the oven to 165 degrees Celsius (325 degrees Fahrenheit). Keep the dish nearby. You will fill it while it is still warm. This lower temperature is central to the recipe, because a gentle bake protects the custard.
Step 4: Mix the Filling
Whisk the brown sugar, granulated sugar, salt, and spices in a large bowl. This spreads the spices evenly. As a result, you avoid pockets of strong spice.
Add the pumpkin puree and whisk until smooth. Then add the eggs and the extra yolk. Whisk gently until just combined.
Pour in the evaporated milk in a slow stream. Add the vanilla too. Stir until the mix looks even and glossy.
Do not whisk with force at this stage. Too much air can form bubbles. In addition, bubbles can leave small holes on the surface.
If you see lumps, pour the filling through a sieve. However, this step is optional. It does guarantee a silky texture.
Step 5: Fill and Bake the Pie
Place the warm crust on a baking tray. Then pour in the filling slowly. Fill the crust almost to the top, leaving a gap of about 5 mm (1/4 inch).
Bake at 165 degrees Celsius (325 degrees Fahrenheit) for 50 to 60 minutes on the middle shelf. Meanwhile, avoid opening the door for the first 40 minutes. Sudden cold air can affect the surface, so check through the oven light if you can.
Step 6: Use the Jiggle Test
The jiggle test tells you when the pie is ready. Gently shake the tray a little. Then watch the centre.
The outer 5 cm (2 inches) should look set. The centre should wobble softly, like set jelly, not like liquid.
If the whole surface ripples, bake for 5 minutes more and test again. However, if the centre looks firm and dry, the pie has baked too long.
Remove the pie at the soft jiggle stage. The centre will finish setting as it cools. Trusting this stage prevents cracks.
Why This Pumpkin Pie Recipe Cracks and How to Prevent It
Cracks have clear causes. Fortunately, each cause has a simple fix.
First, high heat causes cracks. The eggs expand and set too quickly. Then the surface splits as the pie cools. A bake at 165 degrees Celsius (325 degrees Fahrenheit) avoids that stress.
Second, overbaking causes cracks. Even 5 extra minutes can dry the centre. As a result, the top pulls apart. The jiggle test protects you here.
Third, fast cooling causes cracks. A hot pie in a cold room can contract too fast. Therefore, cool the pie slowly, as described below.
Fourth, too much air can cause problems. Vigorous whisking adds bubbles and lift. Then the filling falls and cracks. Gentle mixing solves this.
In addition, a water bath is not needed here. This pie sets well without it, because the temperature is low and steady.
Cooling, Chilling, and Serving This Pumpkin Pie Recipe
Turn the oven off when the pie passes the jiggle test. Then open the oven door a little. Leave the pie inside for 15 minutes. The temperature falls in small steps, so the surface stays smooth.
Next, move the pie to a wire rack. Cool it at room temperature for at least 2 hours. The filling will set fully during this time.
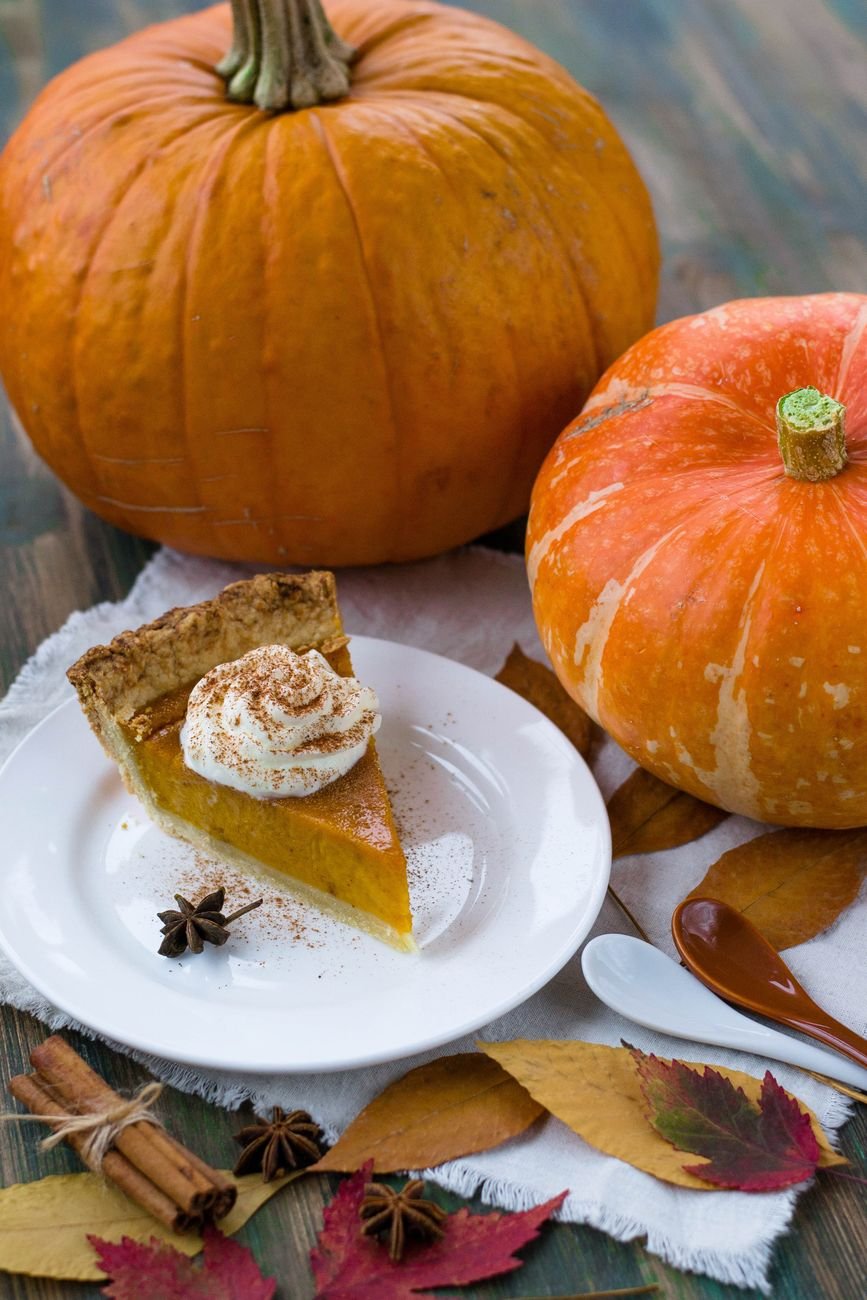
After that, cover the pie loosely. Then chill it in the fridge for at least 4 hours. Ideally, chill it overnight.
Serve each slice cold or at cool room temperature. For example, add a small spoon of lightly whipped cream. Alternatively, serve it plain.
Use a sharp knife for clean slices. Dip the knife in hot water between cuts and wipe it clean each time. As a result, every slice looks neat.
Make Ahead and Freezing This Pumpkin Pie Recipe for Thanksgiving
This pie is ideal for making ahead. In fact, it tastes better the next day. The spices settle and blend overnight.
For Thanksgiving on Thursday, November 26, 2026, bake the pie on Tuesday or Wednesday. Then chill it, covered, in the fridge.
You can also build a balanced menu around it. For instance, this sweet potato casserole recipe adds a classic side. Meanwhile, this cranberry sauce recipe adds bright flavour. In addition, this green bean casserole recipe rounds out the table.
Freezing the Whole Pie
Bake and cool the pie fully first. Then chill it until cold. Wrap it tightly in two layers of cling film. After that, add a layer of foil.
Freeze for up to 1 month. Label the pie with the date. When you need it, thaw it overnight in the fridge. Do not thaw it on the counter, because it is a custard pie.
Serve it cold after thawing. The texture stays close to fresh. However, the crust will be a little softer than on day one.
Freezing in Other Ways
You can freeze the unbaked crust on its own for up to 3 months. Then blind bake it from frozen, adding a few extra minutes.
You can also freeze leftover slices for up to 1 month. Thaw slices in the fridge for a few hours. In addition, extra pumpkin puree freezes well in small portions for up to 3 months.
A Lighter Variation of This Pumpkin Pie Recipe With Honest Estimates
You can lighten this pie without losing its character. However, it will still be a dessert. Honest expectations help you enjoy it more.
First, swap the evaporated milk for the same volume of semi-skimmed milk, 355 ml (12 fl oz). The filling will be a little less rich. Still, it will set well with the extra yolk.
Second, reduce the total sugar by 50 g (1/4 cup). The spices will seem stronger as a result.
Third, serve a thinner slice with fresh fruit. Alternatively, skip the crust for individual baked custards. Reduce the bake time for those to 30 to 35 minutes at the same temperature.
A standard slice, at one eighth of the pie, is roughly 320 to 350 calories, with about 6 to 7 g of protein and 14 to 16 g of fat. The lighter version is roughly 240 to 270 calories per slice, with about 6 g of protein and 8 to 10 g of fat.
These figures are estimates only. If you track your intake, this calorie calculator can help you place a slice in your day. For example, these high protein soup recipes offer filling options for other days of the week.
Storage and Food Safety for This Pumpkin Pie Recipe
Pumpkin pie is a custard pie. Therefore, it needs the fridge.
Cool the pie as directed. Then refrigerate it within 2 hours of cooling at room temperature. Cover it loosely at first, then more tightly once cold.
Stored this way, the pie keeps for 3 to 4 days in the fridge. Keep it away from strong-smelling foods, because custard can absorb other flavours.
For safe handling, follow the basic steps in the USDA food safety guidance. Clean hands, clean tools, and prompt chilling matter. If the pie has sat out for more than 2 hours, it is safer to discard it.
Do not re-freeze a thawed pie. In addition, if you like a warm slice, heat one slice gently and briefly, then eat it straight away.
Common Mistakes to Avoid in This Pumpkin Pie Recipe
Using pumpkin pie filling instead of puree. This is the most common error. Check the tin twice. Plain puree has no added sugar or spice.
Skipping the blind bake. A wet filling on raw dough gives a soggy base. Blind baking solves this. Do not skip it.
Baking too hot. A hot oven sets the eggs too fast. As a result, the pie cracks. Keep the bake at 165 degrees Celsius (325 degrees Fahrenheit).
Overbaking until firm. A firm centre in the oven means an overbaked pie after cooling. Remove it at the soft jiggle stage instead.
Cooling too fast. Moving a hot pie to a cold surface can shock it. Cool it slowly in stages.
Whisking in too much air. Fast whisking adds bubbles. Then the surface can dome and fall. Mix gently once the eggs and milk go in.
Cutting the pie too soon. Warm pie will slump when sliced. Chill it fully first.
Using a watery fresh puree without draining. Fresh pumpkin holds extra water. Drain it well before measuring. Otherwise, the filling may not set properly.
Pumpkin Pie Recipe: Frequently Asked Questions
How do I know my pumpkin pie is done without cutting it?
Use the jiggle test. The edges should look set, and the centre should wobble softly like jelly. It will finish setting as it cools. A knife test can leave a mark, so the jiggle test is cleaner.
Can I use fresh pumpkin instead of canned puree?
Yes, you can. Roast a small sugar pumpkin, blend the flesh, and drain it well. Then measure 425 g (15 oz) of thick puree. The flavour will be lighter, and the colour may be paler.
Why did my pumpkin pie crack on top?
Heat, overbaking, and fast cooling are the usual causes. Bake at 165 degrees Celsius (325 degrees Fahrenheit), remove the pie at a soft jiggle, and cool it in stages. Those three steps prevent most cracks.
How far ahead can I make pumpkin pie for Thanksgiving?
You can bake it 2 days ahead and keep it chilled. For Thanksgiving on Thursday, November 26, 2026, baking on Tuesday works well. Alternatively, freeze the baked pie for up to 1 month and thaw it overnight in the fridge.
Does pumpkin pie need to be refrigerated?
Yes, it does. Pumpkin pie is an egg and milk custard, so it must be chilled. Refrigerate it within 2 hours of room temperature cooling, and keep it for 3 to 4 days.
Can I make this pie without a crust?
Yes, you can bake the filling in small oven dishes as individual custards. Bake them at 165 degrees Celsius (325 degrees Fahrenheit) for 30 to 35 minutes. Chill them well before serving.
A Final Note
This article is for general information and home cooking education only. It is not medical, nutrition, or food safety advice for any individual. Ingredient labels, oven performance, and storage conditions vary, so always follow current official food safety guidance and use your own judgement when preparing and storing food.

 Ablaze Fitness


