

Learning how to do a pull up is one of the most satisfying goals in fitness. The first rep feels impossible, then one day your chin clears the bar and everything changes. This guide shows you how to do a pull up from zero, with a clear plan, honest timelines and no gym membership required to start.
A pull up is a bodyweight exercise where you hang from an overhead bar and pull your body up until your chin passes the bar. It builds the lats, biceps, forearms and core, and it is one of the best measures of relative upper body strength. You do not need to be strong already. You need a method, a bar and a few weeks of steady practice.
What a Pull Up Actually Works
A pull up works more muscle than almost any other bodyweight move. The latissimus dorsi, the large muscles on the sides of your back, do most of the pulling. Your biceps and forearms help bend the elbow, your rear shoulders stabilize the movement, and your core keeps your body from swinging. That is why the first rep feels hard in so many places at once.
Grip strength matters more than most beginners expect. If your hands give out before your back does, the set ends early. Dead hangs and farmer carries build grip, and they cost nothing. You will see both in the plan below, and they are worth doing even after you can do several reps.
Why Most People Fail Their First Pull Up
Most people fail their first pull up for a simple reason. They try the full movement before they have the strength for it, they fail, and they decide pull ups are not for them. That is the wrong conclusion. A pull up is a skill built in stages, and the stages are what this guide teaches. If you can hang from a bar for 20 seconds, you have already started.
Body weight plays a role, and it is worth being honest about it. A pull up asks you to lift your whole body, so every extra kilogram makes the first rep harder. That does not mean you must lose weight first. It means the plan should include pulling strength work plus the other habits that support it, like enough protein and enough sleep. Strength and body composition improve together when the plan is steady.
What You Need Before You Start
You need a bar you can hang from with straight arms and a little space to move. A doorway pull up bar, a bar at the gym or a sturdy bar in a park all work. Check that the bar is fixed firmly before you hang from it, and use a step or a chair to reach it rather than jumping up. A set of resistance bands helps with assisted reps, and chalk or lifting gloves help if your hands sweat.
- A fixed overhead bar that holds your weight
- A step or low box so you can reach the bar safely
- One or two resistance bands for assisted reps
- Chalk or gloves if your palms get slippery
- A phone timer for hangs and rest periods

How to Do a Pull Up in 7 Steps
These seven steps take you from hanging to a full rep. Do them in order, and spend a week or two on each stage that feels hard. Rushing the stages is the main reason people stall, so treat each step as a skill to own before you move on. The method below is the same one coaches use with beginners, and it works whether you train at home or in a gym. If you already follow a beginner strength training plan, add this pull up work after your main lifts, two or three times a week.
Step 1: Master the Dead Hang
Hang from the bar with straight arms, shoulders relaxed and feet off the floor. Hold for 20 to 30 seconds, breathing normally. This builds grip and shoulder stability, and it teaches your body to feel safe under the bar. Do 3 sets of 20 to 30 seconds, three times a week. When 30 seconds feels easy, you are ready for step 2.
Step 2: Learn the Active Hang
From a dead hang, pull your shoulder blades down and together without bending your elbows. Your body rises a few centimetres and your shoulders move away from your ears. Hold for 5 seconds, then relax. This small movement, called a scapular pull, is the start of every rep. Do 3 sets of 8 holds. Most people skip this step, and that is why their first rep feels like a yank instead of a pull.
Step 3: Practise Slow Negatives
Stand on a step so your chin is above the bar, then lower yourself as slowly as you can. Aim for 5 seconds down, keeping your body still instead of dropping. Negatives build the exact strength a pull up needs, because lowering under control trains the same muscles that lift you. Do 4 sets of 3 slow negatives with 90 seconds of rest between sets. When you can lower for a full 5 seconds on every rep, you are close to a full pull up.
Step 4: Add Band-Assisted Reps
Loop a resistance band over the bar and put one foot or knee in it. The band takes some of your weight, so you can practise the full range of motion. Choose a band that lets you do 3 to 5 clean reps. Do 4 sets of 3 to 5 reps, resting 2 minutes between sets. As you get stronger, use a thinner band. Bands are the bridge between negatives and a full rep, so do not rush past them.
Step 5: Practise the Top Hold
Jump or step up so your chin is above the bar, then hold for as long as you can. Aim for 10 seconds, then build to 20. Top holds teach the finish position and build the biceps and forearms where they are weakest. Do 3 sets of 10 to 20 second holds. If you are learning how to do a pull up for the first time, this hold is the moment the movement starts to feel possible.
Step 6: Try a Full Rep From a Dead Hang
Hang with straight arms, pull your shoulders down, then pull your chin above the bar in one smooth movement. Do not kick or swing. Lower slowly for 3 to 5 seconds. If you get halfway and stop, that is useful data, not failure. Go back to negatives and band work for another week, then test again. Many people get their first rep on a day they did not expect it, because the strength was already there.
Step 7: Build to 3 Reps, Then a Routine
Once you can do one rep, the goal changes from one rep to a routine. Do sets of 1 rep with full rest, then 2 reps, then 3. A good starter routine is 5 sets of 2 reps, three times a week, with a rest day between sessions. How many rest days a week you need depends on your recovery, so listen to your body and add a day off if your elbows or shoulders complain. When 3 sets of 5 feels comfortable, you can add volume, try a second variation like chin ups, or start working toward 10 reps.
The 4-Week Plan to Learn How to Do a Pull Up
This 4-week plan shows you how to do a pull up on a steady schedule. Train three days a week, for example Monday, Wednesday and Friday, and rest on the other days. Each session takes about 15 minutes. If a week feels too easy, move on. If it feels too hard, repeat it. Repeating a week is not falling behind. It is how strength is built.
Week 1: Hang and Hold
Do 3 sets of 20 second dead hangs, 3 sets of 8 scapular pulls and 3 sets of 3 slow negatives. Rest 90 seconds between sets and finish with a 30 second plank. The goal this week is comfort under the bar, not reps.
Week 2: Negatives and Top Holds
Do 4 sets of 3 negatives at 5 seconds down, 3 sets of 10 second top holds and 3 sets of 20 second dead hangs. Rest 90 seconds between sets. You should feel the lowering phase getting smoother by the third session.
Week 3: Bands and First Attempts
Do 4 sets of 4 band-assisted reps and 3 sets of 3 negatives, then take one honest attempt at a full rep from a dead hang at the end of each session. Keep the attempt clean, with no kicking and no swinging. If the attempt fails halfway, note where you stopped and go back to bands.
Week 4: Test and Build
Warm up with hangs and one set of negatives, then test your first full rep. If you get it, do 5 sets of 1 rep with 2 minutes of rest. If you do not get it yet, repeat week 3 for one more week and test again. Either way, you are stronger than you were in week 1, and the next test usually lands. Recovery matters as much as the work, so read our guide on how to recover faster after workout and use its tips between sessions.
Common Mistakes That Stall Your First Rep
Small errors add up when you are learning how to do a pull up. Most of them are easy to fix once you know what to look for. Check yourself against this list every week, because a mistake you fix now saves you a month of stalled progress.
Mistake 1: Kipping and Swinging
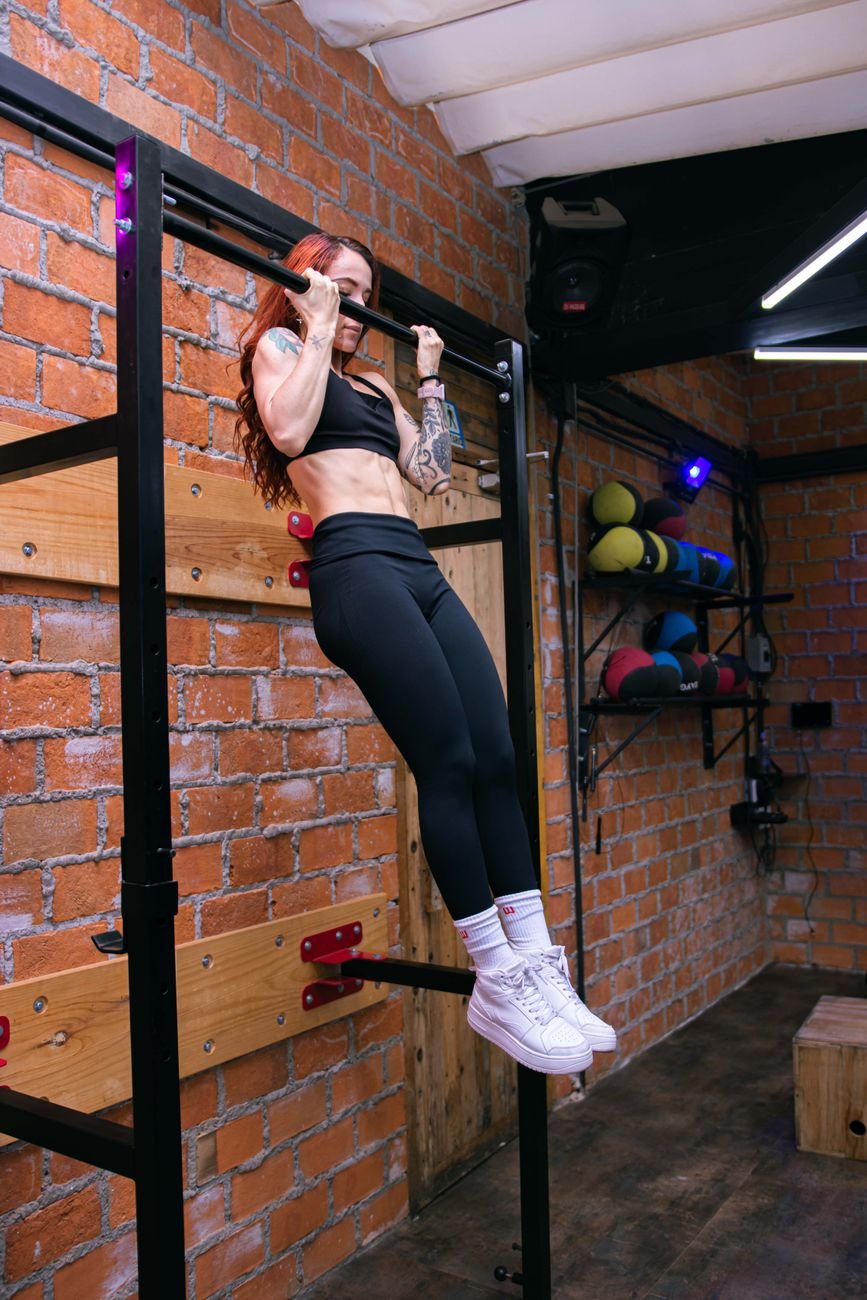
Kipping, where you swing your legs to build momentum, turns a strength move into a swing. It also puts your shoulders in a risky position at the bottom of the rep. Keep your legs still and your core tight. If you cannot do a rep without swinging, go back to negatives and band work until you can.
Mistake 2: Skipping the Warm Up
Cold shoulders and a cold grip fail early. Warm up with 5 minutes of light movement, then do a set of easy stretches to improve flexibility in your shoulders and back before you touch the bar. Two minutes of shoulder circles and dead hangs is enough, and it makes the first working set feel much better.
Mistake 3: Training Every Day
Pull up strength comes from the recovery between sessions, not from the sessions alone. Training to failure every day tires the elbows and shoulders and slows progress. Three sessions a week is enough for most beginners. On rest days, walk, stretch or do light foam rolling instead of another hard session.
Mistake 4: Only Trying Full Reps
If your whole workout is failed attempts at a full rep, you are not building strength, you are practising failure. Negatives, holds and band-assisted reps build the strength that makes the full rep possible. Spend most of your time on the stages you can do well, and test the full rep once a week at most.
How Long Does It Take to Learn How to Do a Pull Up?
Most beginners who train three times a week get their first pull up in 4 to 12 weeks. People with a background in rowing, climbing or gymnastics often get there in 2 to 4 weeks, while people starting from a desk job and no upper body training may need 3 months. All of those timelines are normal. The plan in this guide is built for the middle of that range, and repeating a week is part of the method, not a setback.
The fastest way to learn how to do a pull up is to train the stages consistently rather than testing the full rep every day. Three focused sessions a week beat seven frustrated ones. Keep a simple log: hangs, negatives, band colour and hold times. When the numbers move, the first rep follows. If progress stops for two weeks, check your sleep, your protein and whether you are actually resting between sessions. Small fixes usually restart progress.
How to Do a Pull Up: Frequently Asked Questions
How many pull ups should a beginner aim for?
One clean rep is the first goal. After that, aim for 3 sets of 3, then 3 sets of 5. A beginner who can do 5 strict pull ups has solid relative strength, and from there you can add sets, slow the tempo or try weighted variations.
Can I learn how to do a pull up at home?
Yes, if you have a sturdy bar. A doorway bar is enough for hangs, negatives and full reps. Make sure the bar is fixed properly and that you have space to hang without hitting a wall. If you train at home, a set of bands and a step are the only other tools you need.
Do pull ups build biceps?
Yes, pull ups work the biceps along with the lats and forearms. They are not a replacement for direct arm work if bigger arms are your main goal, but for general upper body strength they are one of the best exercises you can do with no weights at all.
Why can I do chin ups but not pull ups?
Chin ups use an underhand grip, which lets the biceps help more, so most people find them easier. A pull up uses an overhand grip and asks more of the lats. The gap is normal. Keep training pull up negatives and top holds, and the pull up will catch up with the chin up.
What to Do After Your First Pull Up
Once you can do 3 sets of 5, you have choices. Add a rep each week until you reach 3 sets of 10, then slow the lowering phase to 5 seconds or add a small weight with a dip belt. You can also try new grips: a neutral grip is kinder to the elbows, and a wide grip changes the feel of the pull. Keep the same structure that got you here, three sessions a week with rest between them, and progress will keep coming. If you train at home, our guide to the best home gym equipment for beginners covers sturdy bars and the other basics worth owning.
Pull Up Grip Positions: Which Grip Should You Use?
When you first learn how to do a pull up, start with the standard overhand grip, hands just wider than your shoulders. This grip works the lats the most and is the one to learn first. A chin up uses an underhand grip with your hands shoulder width apart, and it lets the biceps help more, which is why most people can do more chin ups than pull ups. A neutral grip, where your palms face each other, is the kindest option for sore elbows and is a good choice if your joints complain.
Grip width changes the feel but not the value of the exercise. A very wide grip shortens the range of motion and can irritate the shoulders, so keep your hands no more than a hand width outside your shoulders. Whatever grip you choose, keep the same rules: straight arms at the bottom, chin above the bar at the top, and a slow lower. If you are learning how to do a pull up, master the standard overhand grip first and treat the other grips as variations for later.
Your first pull up is a skill, not a talent. Hang, pull your shoulders down, lower slowly, use bands, hold the top, then test. Do that three times a week for a month and the bar stops feeling like an enemy. Start today with a 20 second dead hang, and log it. The rep will come.
This article is general information only and is not medical advice. If you have a shoulder, elbow or wrist injury, or a health condition that affects exercise, talk to a doctor or a qualified physiotherapist before starting a pull up programme. Stop and seek advice if you feel sharp pain.

 Ablaze Fitness


 Mélanie Courcelles


